Alpine.js + jQuery/JavaScript Plugin Integration: a Select2 example
One of the jQuery ecosystem’s greatest strength is the wealth of drop-in plugins available.
Alpine.js is a great way to phase out jQuery spaghetti code from current and future projects with its declarative nature and small bundle size.
What Alpine doesn’t have (yet), is a thriving plugin ecosystem. However, it’s all “just JavaScript” and it’s completely possible to leverage jQuery plugins in Alpine.js components.
There have been a slew of questions in the Alpine.js Issues about integrating 3rd party libraries and jQuery plugins. This post will go through the example of integrating Select2 - The jQuery replacement for select boxes although the principles and tools explained should work for other plugins and tools.
This post is “choose your own adventure”, if you’re interested in a CodePen or copy-pasting the code, head straight to Show me the code. If on the other hand you’re interested in the step by step breakdown of the integration, that follows the first code/demo section.
Table of Contents
Show me the code
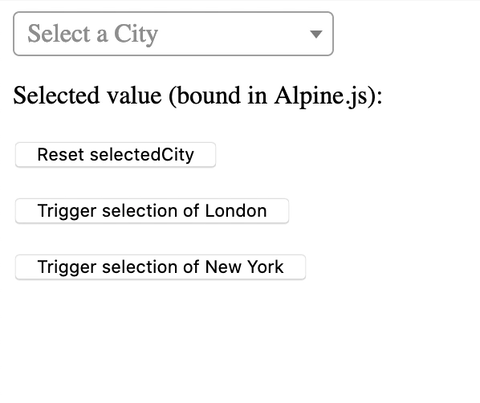
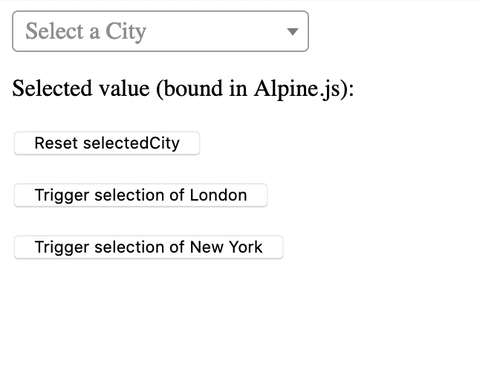
Here’s a Select2 input whose selection state is synced to Alpine.js and which reflects Alpine.js state.
See the Pen Alpine.js + jQuery select2 by Hugo (@hugodf) on CodePen.
Here’s the full working code in the “No Script Tag Here” style, ready to copy paste. If you’re interested in the step by step of how we came to this, read the next sections.
<div
  x-data="{ selectedCity: '' }"
  x-init="() => {
    select2 = $($refs.select).select2();
    select2.on('select2:select', (event) => {
      selectedCity = event.target.value;
    });
    $watch('selectedCity', (value) => {
      select2.val(value).trigger('change');
    });
  }"
>
  <select x-ref="select" data-placeholder="Select a City">
    <option></option>
    <option value="London">London</option>
    <option value="New York">New York</option>
  </select>
  <p>Selected value (bound in Alpine.js): <code x-text="selectedCity"></code></p>
  <p>
    <button @click="selectedCity = ''">
      Reset selectedCity
    </button>
  </p>
  <p>
    <button @click="selectedCity = 'London'">
      Trigger selection of London
    </button>
  </p>
  <p>
    <button @click="selectedCity = 'New York'">
      Trigger selection of New York
    </button>
  </p>
</div>
Step by step integration of jQuery plugin Select2 with Alpine.js
Our select2 integration works as follows, this is a step by step tutorial, the full working code is in the previous section and in the Alpine.js + jQuery select2 CodePen.
0. Setting the scene
We’ll start with an Alpine.js/jQuery/Select2 app which allows us to pick a city by clicking buttons.
Note that we would usually be able to 2-way bind the select element using x-model, but this is not the purpose of this exercise.
The goal is for Alpine.js state (selectedCity) and a Select2 box initialised on the “Select a City” select to always reflect each other’s state (2-way binding). That is:
- if we select a value using the Select2 box, the value should update in the Alpine.js application state
- if we update the value of Alpine.js state (
selectedCity), this update should be reflected in the Select2 selection.
Here’s the initial code, which doesn’t work.
<div x-data="{ selectedCity: '' }">
  <select data-placeholder="Select a City">
    <option></option>
    <option value="London">London</option>
    <option value="New York">New York</option>
  </select>
  <p>Selected value (bound in Alpine.js): <code x-text="selectedCity"></code></p>
  <p>
    <button @click="selectedCity = ''">
      Reset selectedCity
    </button>
  </p>
  <p>
    <button @click="selectedCity = 'London'">
      Trigger selection of London
    </button>
  </p>
  <p>
    <button @click="selectedCity = 'New York'">
      Trigger selection of New York
    </button>
  </p>
</div>
1. Add an x-ref on the element to initialise with jQuery Select2
Our first step is to add a ref on the select that we’ll turn into a select2 box using x-ref="select", we can now access this element using $refs.select or this.$refs.select.
<div x-data="{ selectedCity: '' }">
  <select x-ref="select" data-placeholder="Select a City">
    <!-- options etc, no change -->
  </select>
  <!-- rest of template, no change -->
</div>
2. Add an x-init handler + initialise the Select2 box
Next, we add an x-init handler to our Alpine.js component.
In x-init we initialise the Select2 box by creating a jQuery instance (using $(element)) from $refs.select (which we defined in the previous step) and calling .select2() on it. In full: $($refs.select).select2().
We set the output of .select2() as the select2 instance variable in order to access it later.
<div
  x-data="{ selectedCity: '' }"
  x-init="
    select2 = $($refs.select).select2();
  "
>
  <!-- rest of template -->
</div>
The issue we’re now facing is that the Select2 box can update without the Alpine.js state being updated. We’ll fix this in the next step.
3. Listen to select2:select events and update selectedCity Alpine.js state
In order to update Alpine.js state when a Select2 selection happens (select2:select event), we’ll use our select2 instance and use the jQuery .on() method to add a listener for selection events.
When select2:select event occurs, we’ll run a callback that updates selectedCity to the event.target.value.
<div
  x-data="{ selectedCity: '' }"
  x-init="
    // select2 instantiation
    select2.on('select2:select', (event) => {
      selectedCity = event.target.value;
    });
  "
>
  <!-- no template changes -->
</div>
Changes to the Select2 box are now reflected in Alpine.js state as per the following screen capture.
We’ve now seen how to sync selection data from Select2 to Alpine.js using .on('select2:select', callback).
Note that when we click the “Reset” and “Trigger” buttons, Select2 doesn’t update, that’s because Alpine.js state updates don’t get synced back to Select2.
In the next section we’ll see how to synchronise Alpine.js state changes to Select2 using $watch and jQuery’s .val().trigger() methods.
4. $watch and set value with .val().trigger()
The previous sections we created a select2 instance using x-init and registered a listener on select2:select which sets Alpine.js selectedCity state to the selection data.
The final step in this guide is to make sure that changes to Alpine.js state are reflected/synchronised to Select2’s state.
In order to do this, we’ll add a $watch('selectedCity', callback) expression in x-init (after instantiating the select2).
In the $watch callback, we’ll set the value of the select2 instance with the .val() method and trigger an update using .trigger('change'). Put together the callback is (value) => select2.val(value).trigger('change'), ie. when selectedCity changes, take the new value, set it as select2’s value and trigger an update.
<div
  x-data="{ selectedCity: '' }"
  x-init="
    // select2 instantiation & listener binding
    $watch('selectedCity', (value) => {
      select2.val(value).trigger('change');
    });
  "
>
  <!-- no template changes -->
</div>
Changes to Alpine.js selectedCity state are now reflected in the Select2 box as per the following screen capture.
We’ve now looped the loop:
- Select2 gets initialised when the Alpine.js component initialises
- Select2 updates are synchronised to Alpine.js state
- Alpine.js state updates are reflected in the Select2 box
Next we’ll recap the steps that we’ve just gone through.
Wrapping up - Summary of an Alpine.js + JavaScript/jQuery plugin integration
The steps to integrating a jQuery/JavaScript plugin like Select2 are as follows:
- Add
x-refto the element on which you’re going to initialise the plugin, this makes it easier to access through$refs/this.$refs. - Initialise the plugin in
x-initmaking sure to keep the instance around, with jQuery plugins that usually meansinstance = $($refs.pluginElement).pluginName(/* plugin options */), note the$()around the ref, which wraps the DOM Node/element in a jQuery instance. - If you need to synchronise plugin updates -> Alpine.js state, add listeners for the relevant events on the plugin instance & update Alpine.js state in the listener callback. For jQuery plugins where events are namespaced with the
pluginname:instance.on('plugin:event', (event) => { alpineState = event.target.value }). - If you need to synchronise Alpine.js state -> plugin, add the relevant
$watch('alpineState', callback)expression in this watcher callback, trigger updates on the plugin instance. In most jQuery plugins that meansinstance.val(value).trigger('change'). - If you’re keen to clean up whatever your Alpine.js component initialised, you can use
instance.trigger('destroy')per jQuery’s norm ofinstance.trigger('destroy').
That’s it for this post, you can check out the Alpine.js tag on Code with Hugo for more in-depth Alpine.js guides.
If you’re interested in Alpine.js, Subscribe to Alpine.js Weekly. A free, once–weekly email roundup of Alpine.js news and articles.
Interested in Alpine.js?
Power up your debugging with the Alpine.js Devtools Extension for Chrome and Firefox. Trusted by over 15,000 developers (rated 4.5 ⭐️).
